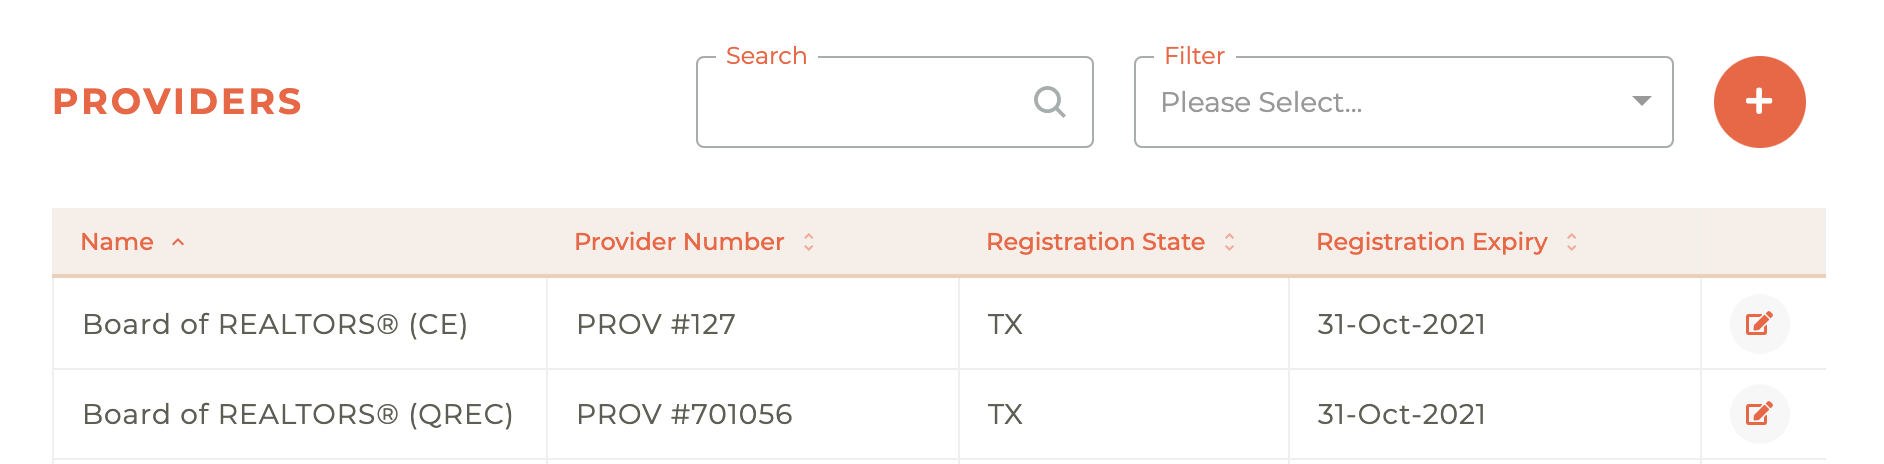
¶ Providers
All of your education providers will be located in this dashboard. You may search by name and filter by Status (Active or Retired) and each column may be sorted using the - - Sort icon at the top of each column.
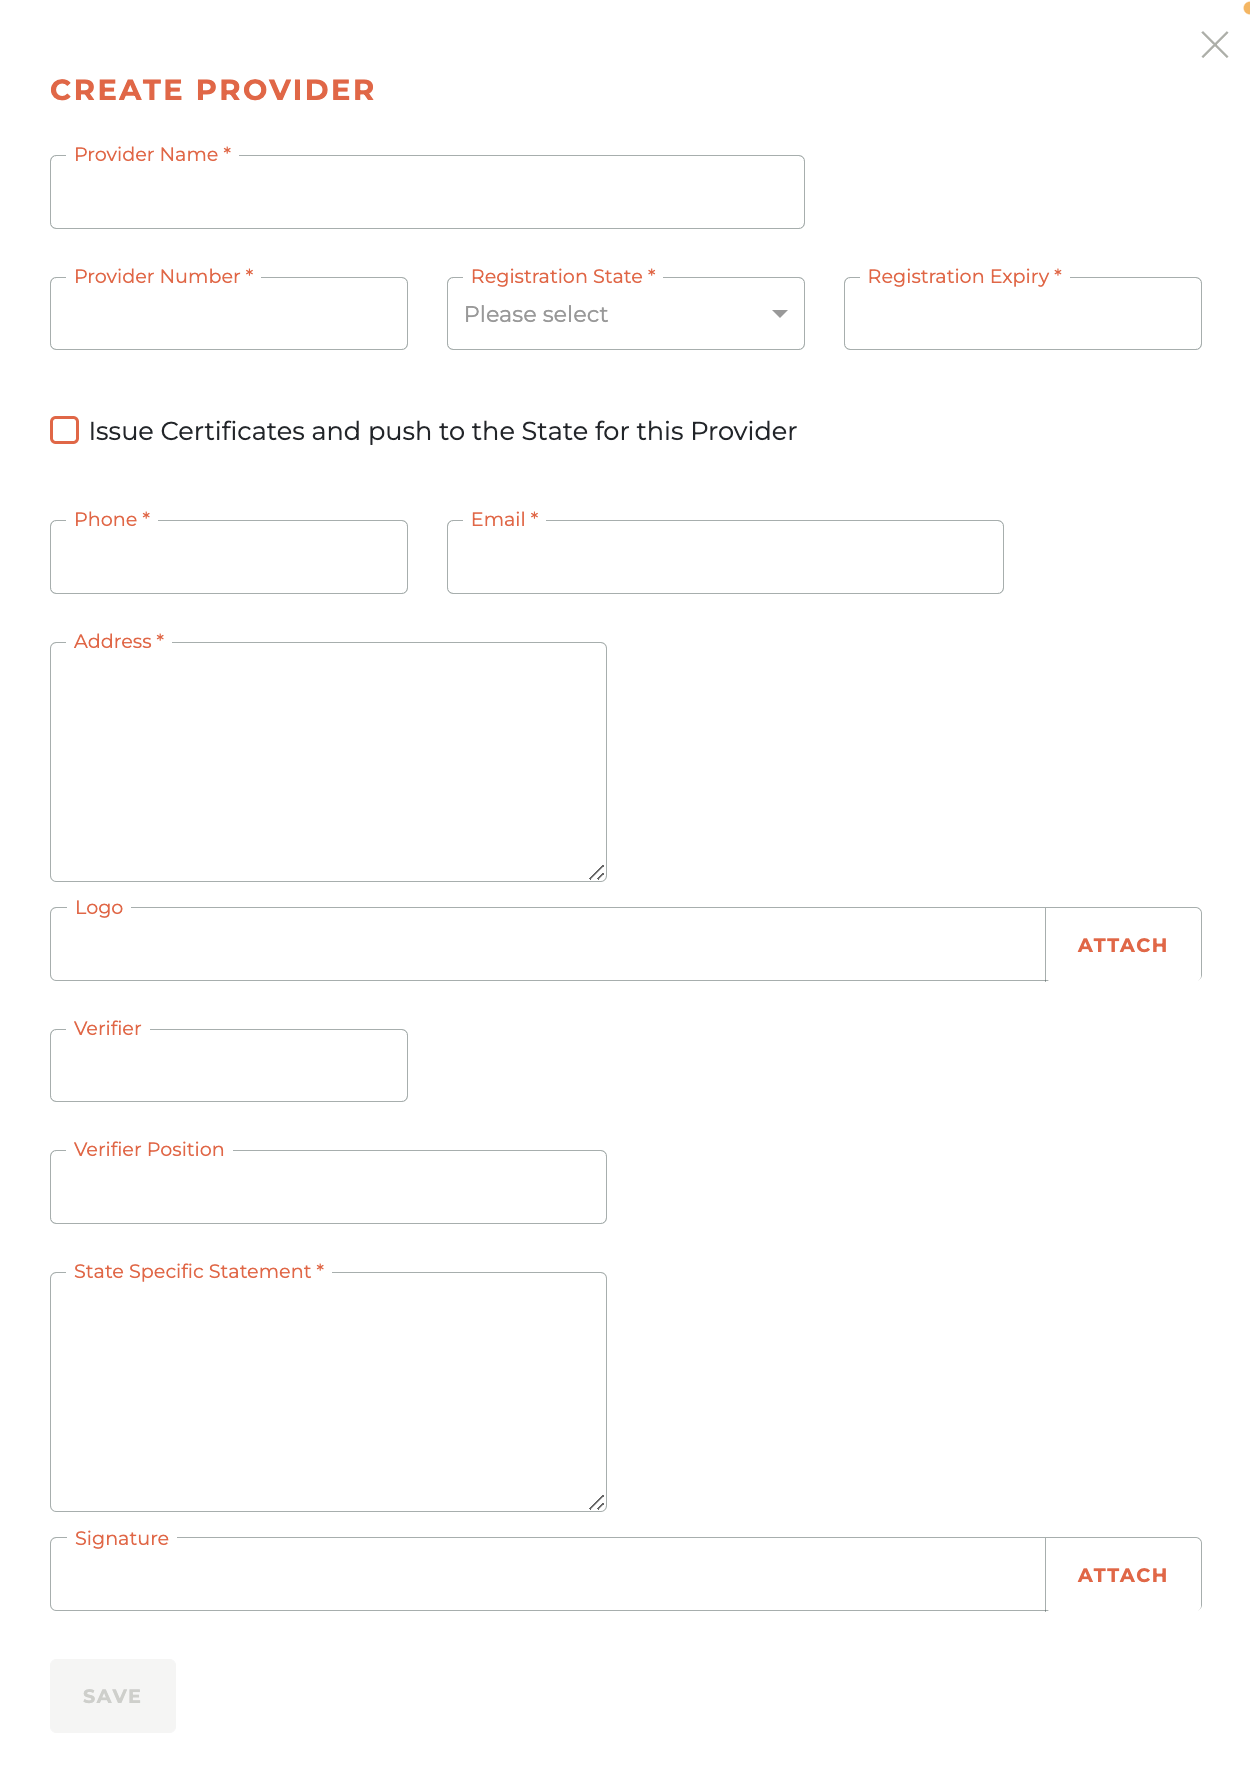
¶ Creating A New Provider
Clicking on the - - icon in the upper right hand corner of the Providers dashboard causes the Create Provider window to slide out from the right side of the dashboard. Every field on this menu is required before you can save. If you are going to issue the Certificates for completion for this provider, please select the "Issue Certificates for this Provider" radio button. There is no additional information collected on this screen when that option is selected.
-
Verifier - The verifier is typically the staff member whose name will be on the certificate and can verify attendance to a class.
-
Signature - This is a signature file that you manage. Pleae make this a .png or .jpg file.
¶ Provider Details
This section captures the primary identification and registration information for the provider.
- Provider Name: Enter the full name of the provider or organization.
- Provider Number: Input the officially assigned provider number.
- Registration State: Select the state where the provider is registered from the dropdown menu.
- Registration Expiry: Enter the date on which the provider's registration expires.
Below these fields is a checkbox labeled Issue Certificates and push to the State for this Provider. Select this option if you want the system to automatically generate and send certificates to the state authority for this provider.
¶ Contact Information
Here, you will enter the provider's contact details.
- Phone: The provider's primary phone number.
- Email: The provider's primary email address.
- Address: The provider's full mailing address.
¶ Verification and Branding
This section is for adding verification details and branding assets.
- Logo: Click the "ATTACH" button to upload the provider's logo file.
- Verifier: Enter the name of the person verifying the provider's information.
- Verifier Position: Enter the job title or position of the verifier.
- State Specific Statement: Use this text box to include any statements required by the specific state.
- Signature: Click the "ATTACH" button to upload an image file of the provider's signature.
¶ Saving the Form
Once you have reviewed all the entered information for accuracy, click the SAVE button at the bottom left of the screen to create the new provider profile.
¶ Editing A Provider
Clicking on the - - icon for any existing provider will cause the Edit Provider window to slide out from the right side of the dashboard. You may edit or update any peice of provider information at any time.
¶ Frequently Asked Questions
| # | Question | Answer |
|---|---|---|
| 1 | Where can I see a list of all education providers? | The Providers dashboard shows every provider in your system; you can search by name, filter by Status (Active or Retired), and sort any column. |
| 2 | How do I start creating a new provider? | Click the + icon in the upper-right corner of the Providers dashboard—this opens the Create Provider panel that slides in from the right. |
| 3 | Are all fields on the Create Provider form required? | Yes. Every field on the form must be completed before you can click SAVE. |
| 4 | What information goes in “Provider Details”? | Enter the Provider Name, Provider Number, Registration State, and Registration Expiry date. |
| 5 | What does “Issue Certificates and push to the State for this Provider” do? | Selecting this checkbox tells Tangilla to automatically generate course-completion certificates and send them to the appropriate state authority for this provider. |
| 6 | What should I fill in under “Contact Information”? | Provide the provider’s Phone, Email, and full Mailing Address. |
| 7 | Which branding and verification items can I upload? | You can attach a Logo image and Signature image, specify the Verifier’s name and position, and add any State-specific statement text. |
| 8 | How do I edit an existing provider later? | Click the edit icon next to any provider; the Edit Provider panel will slide in so you can update information at any time. |
| 9 | Can I quickly narrow the list of providers? | Yes. Use the search box to find a provider by name, or apply the Status filter (Active / Retired). All columns also support click-to-sort. |
| 10 | What statuses can a provider have? | A provider can be Active (currently offering courses) or Retired (no longer in use). |
| 11 | Does selecting “Issue Certificates” ask me for extra details? | No. The radio button simply toggles the behavior—no additional fields appear on the form. |
| 12 | What file types are accepted for logo or signature uploads? | Upload images in .png or .jpg format. |
| 13 | Who should I list as the Verifier? | The verifier is usually the staff member whose name appears on certificates and can confirm attendance. Include their name and position. |
| 14 | How can I tell which fields are mandatory? | Any field with a red asterisk (*) is required and must be completed before saving. |