¶ Portal Messages - Categories
Portal Message Categories allow for a more granular customization of the portal messages.
By creating categories you can filter which people should see a message and organize the messages in categories for a more tidied display in the agent's portal.
Categories consist of a label and a segment.
The Portal Message Categories screen can filter out and order the categories, accessing the categories will show their label, segment, and messsages linked to it.

¶ Creating A Portal Message Category
To create a new Portal Message Category, click on the - - icon in the upper righ hand corner of the Portal Messages dashboard. This will cause the Create Portal Messages Categories slide to show on the right side of the screen.
When creating one, it's only input will consist of its label

¶ Editing A Portal Message Category
Clicking on the Edit button - - will just open a slide with its label to change it.
However clicking on the Segment button - - will allow to add, change or remove the segment linked to the category to filter in all the agents who should receive the messages assocaited with it.
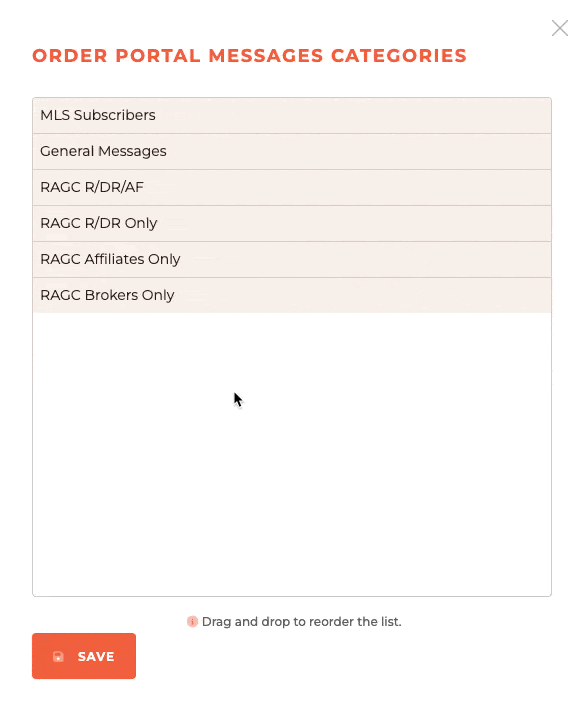
¶ Ordering Portal Message Categories
The order in which the Message Categories appear, both in the notifications and on the home page, is controled by the sort order of the categories. This is controlled by clicking on the Sort icon ( ) to the left of the Add/Create icon ( ) icon in the upper right of the screen. If you have numerous messaged displaying on the home page, you can ensure that the most important one appears at the top by ordering the category in which the message appears.
¶ Viewing Messages
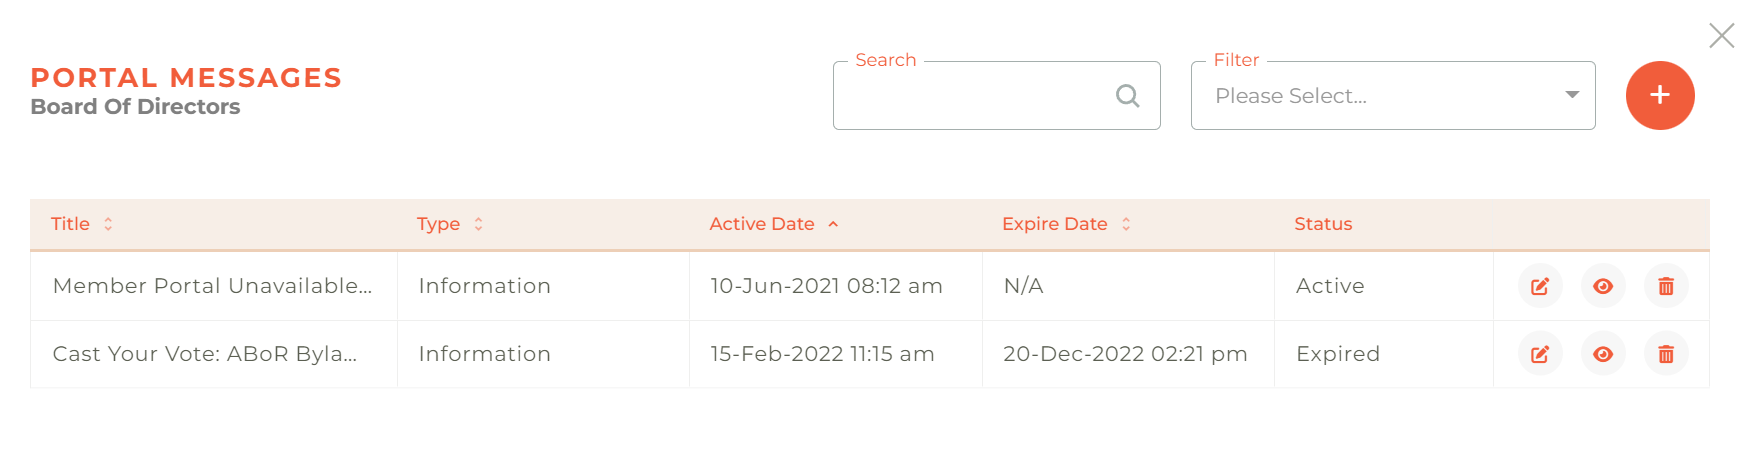
Clicking on the messages button will open the messages tab, here you can look into all the messages linked to the category selected to make the search for them easier.
Here you'll have all the options available to edit them as from the Portal Message screen, except for editing the category, as that has to be changed from the Portal Message screen.
¶ Deleting A Portal Message Category
You may delete any portal message category at any time. Simply click on the - - icon and the deletion warning will pop up to make sure you want to delete the category. While this can't be undone, Categories are simple to recreate and make active instantly.
Note that Categories linked to existing messages can't be deleted unless all messages are deleted or moved to another category